Connect Postpari to Claude
Follow these screenshots from Claude to add Postpari as a custom connector.
Use the same URL in Claude on web or desktop.
- 1
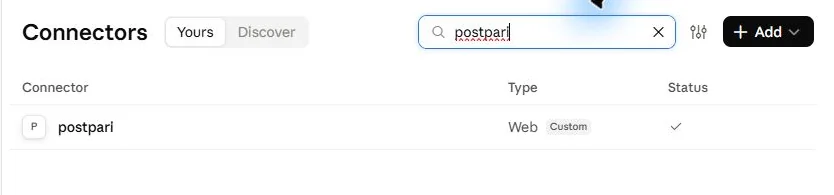
Open Claude’s connectors
In Claude, open your profile menu, choose Settings, then Connectors. You can also use Open Claude connectors ↗ after signing in.
- 2
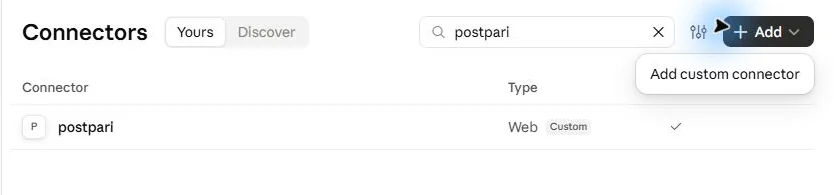
Add a custom connector
Select Add and then Add custom connector.
- 3
Enter Postpari’s details
Set the name to Postpari, paste
https://postpari.com/mcpinto MCP server URL, then choose Continue. No client ID or secret is needed.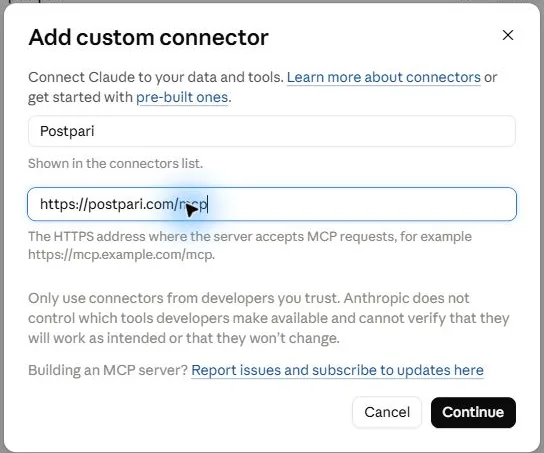
- 4
Authorize your account
Sign in to your Postpari account when prompted, review the requested access, and approve the connection. Back in Claude, Postpari should appear as connected. Enable it from the + menu in a chat if needed.

Ask Claude: “Show my connected Postpari accounts.” Claude can only see the Postpari account you authorized. For help, contact us.
On Claude Team or Enterprise, an organization owner may need to add the custom connector first. Connector availability and screens can vary by Claude plan and version.
Screenshots captured from Claude in September 2026. Claude’s connector help ↗